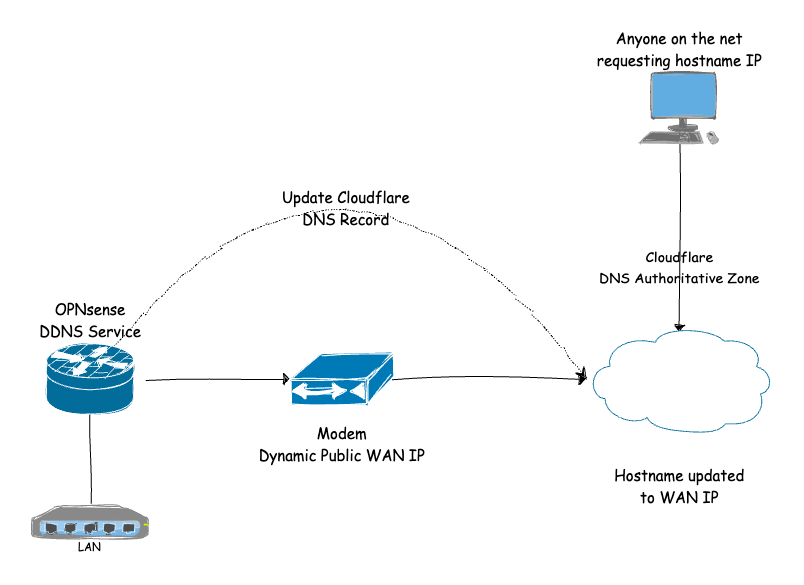
This process changes often as OPNsense has moved away from dd-client plugin and integrated cloudflare into the native system. This process works as of December 2023.

Pre-reqs
- Cloudflare setup with you domain (example.com)
- DNS A record for hostname in Cloudflare (host.example.com)
Basic Steps
- Create Cloudflare API Token
- Create DDNS service in OPNsense
Create Cloudflare API Token
Use the template for Edit DNS
- Edit the token name to something descriptive, (this will be the username in OPNsnese)
- Zone , DNS, Edit
- Zone, Zone, Read
- Include – All zones
Keep the API token, this will be the password for the DDNS service.
Create OPNsense DDNS service
OPNsense > Services > Dynamic DNS
Make sure the “native” option is selected for “backend” under general settings.
- Description : something meaningful
- Service: Cloudflare
- Username: token name from creating API steps above
- Password: API token from creating API steps above
- Zone: domain name in format example.com
- Hostname: Full FQDN in format host.example.com
- Check IP method: Interface
- Interface to monitor : WAN
- Check IP Timeout: 10
- Force SSL: YES
Quirks
- I’ve noticed that if the A record is edited in Cloudflare from the web UI, after OPNsense updates it, OPNsense will not update it again. To fix this, I roll the API token, and update the DDNS service. The A record in Cloudflare then updates from OPNsense.


